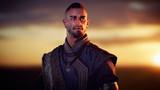


Discover how to take pre-existing scanned assets and quickly and professionally clean them up using a combination of Wrap 3, ZBrush, and Maya. This workshop by Modeler and Generalist, Scott Denton, details the clean-up of a scan created by NYCap3D using the state-of-the-art photogrammetry solution, RealityCapture, along with assets produced by 3D Scan Store. A brief preview of Zoo Tools is also covered.
Throughout the course of the workshop, Scott discusses how to use Wrap 3 and ZBrush to transfer textures and displacement details from the 3dScanstore mesh. He also goes over some of the specific setups and essential tools inside of both Wrap and ZBrush that help to speed up the overall workflow. Scott teaches the important export options that you need to know and includes a demonstration on how to hook the textures up in Maya to achieve a render worthy of being passed on to a look-development artist. Helpings of industry tips are included along the way, particularly when it comes to what look-dev artists expect of modelers, plus tricks for organizing and naming your files like a pro.
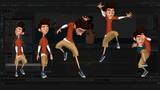
The final portion of the workshop covers how to create a quick rig using Mixamo to bring some life to the character for the final renders using Arnold in Maya.
The goal of this video tutorial is to provide you with a sound understanding of scan clean-up work and provide you with new skills that will help to speed up your workflow in the studio. The ultimate goal being for you to get home on time while still delivering high-quality results.
15 Lessons
In this introductory lesson, Scott Denton demonstrates how to establish real-world scale for a scanned character using Maya. He converts the character’s known height into centimeters, uses the Distance Tool to define accurate measurements, and creates a reference cube to maintain consistent scale when transferring the asset into ZBrush. This workflow helps ensure proper proportions for downstream rendering and lighting in physically based renderers.
Duration: 4m 40s

In this lesson, Scott shows how to import scanned geometry into ZBrush and align it to a real-world scale reference. The process covers correctly orienting the scan, centering it in the scene, and scaling it to match a previously created reference cube. Multiple scan resolutions are organized and prepared, establishing a clean, consistent setup for efficient sculpting and cleanup.
Duration: 7m 13s

In this lesson, Scott demonstrates a quick cleanup pass on scanned geometry in ZBrush. The lesson covers isolating and removing unwanted areas, closing open holes, and preparing multiple scan resolutions for evaluation. By comparing detail density across meshes, he explains how to identify the most efficient version to continue working with, establishing a clean, optimized starting point for the next stage of the workflow.
Duration: 4m 44s

In this lesson, Scott demonstrates how scan data can be retopologized in ZBrush to prepare a mesh for downstream production. Scott covers cleaning stray geometry, closing open areas, and using ZRemesher to establish clean, manageable topology. He also explains how high-resolution scan details are reprojected onto the new mesh and refined through light smoothing, resulting in an optimized model ready for further cleanup.
Duration: 15m 52s

To align third-party scan assets with a real-world production pipeline, this lesson focuses on scaling 3D Scan Store meshes to match an accurately sized character scan. Scott imports a Scan Store asset and prepares it for upscaling by deleting lower subdivision levels to preserve surface detail. Using Transpose Set, the mesh is uniformly scaled to real-world proportions, where subdivision levels are reconstructed to restore detail. The finalized asset is then exported and used as a properly scaled base for wrapping and fitting to the primary character scan, ensuring consistent proportions and reliable results for downstream retopology and deformation.
Duration: 5m 27s

In this lesson, the focus shifts to conforming scan data to a clean production mesh. Scott covers breaking the scan into manageable regions and progressively guiding geometry so it wraps cleanly over the target mesh. Control points are placed at key anatomical landmarks and mesh apexes to ensure the retopologized surface follows the underlying scan accurately. As the wrap progresses, problem areas are adjusted manually to correct distortions or misalignments, resulting in a final mesh that adheres closely to the scan while remaining animation- and production-friendly.
Duration: 20m 55s

In this lesson, Scott imports the scan onto the 3D Scan Store base and demonstrates how quickly the full likeness and high-frequency detail appear, highlighting how much time this approach saves compared to sculpting everything by hand. After inspecting problem areas, he uses projection, smoothing, and Transpose tools to refine forms while preserving detail, explaining techniques such as reprojecting, post-symmetry cleanup, and relaxed smoothing. The result is a clean, detailed character that closely matches the original scan.
Duration: 6m 3s

The focus shifts to transferring albedo information from the older scan to the newly wrapped and cleaned mesh. Scott begins by organizing subtools into a clear work structure, keeping legacy assets visible for reference while isolating the meshes relevant to the transfer. With the new scan visible, he ghosts and masks specific regions to prevent unwanted texture data, such as shorts or non-skin areas, from projecting onto the character. Using projection based on spatial alignment, he transfers the color data, then refines the result by hand, correcting areas like the hairline and clothing edges where the scans do not perfectly match. The lesson emphasizes a practical blend of automated projection and manual cleanup to achieve clean, believable skin textures on the final mesh.
Duration: 17m 54s

This lesson focuses on thoughtful problem solving rather than strict technique, blending practical production needs with artistic judgment. Scott treats symmetry as a technical requirement for rigging and downstream workflows, while deliberately preserving facial asymmetry to maintain realism and likeness. Alignment is handled visually rather than through rigid transforms or scale references, prioritizing observation over exact measurements. By moving between ZBrush and Maya, the workflow remains flexible, using each tool where it is most effective and emphasizing intent, evaluation, and decision making over mechanical, step-by-step execution.
Duration: 15m 11s

This lesson centers on preparing the character for a production-friendly pose, specifically adjusting the arms and hands into a clean, neutral A pose suitable for rigging. Rather than treating the posing process as a purely technical requirement, Scott approaches it with anatomical awareness, carefully rotating and repositioning the limbs while preserving the natural flow of the muscles and surface detail. The emphasis is on balance and neutrality, aligning the body in a way that feels relaxed, believable, and functional for downstream rigging needs while minimizing distortion and avoiding unnecessary loss of sculpted information.
Duration: 9m 30s

Establishing believable eye placement can be accomplished by treating the eye as a real anatomical structure rather than a simple placeholder. Scott moves between ZBrush and Maya to ensure the eyeball is correctly sized and positioned within the skull, emphasizing how the surrounding forms of the face and eye socket naturally wrap around it. Attention is given to how the eye sits in the head, how the iris and pupil align, and how the overall construction of the eye, including the lens, contributes to realism. The lesson reinforces an anatomically grounded approach to eye construction, ensuring expression, proportion, and later deformation feel intentional rather than left to guesswork.
Duration: 38m 20s

This lesson centers on refining the subtle transitions around the eyes and mouth that sell realism, treating features such as wet lines, teeth, and gums as connected anatomical systems rather than isolated details. Scott establishes proper depth and structure by placing a mouth bag inside the head, then refines the wet areas of the eyes, including the waterline and caruncula, treating them as living tissue instead of simple edges. Eyelids and eyelashes are adjusted to follow the underlying forms and sit correctly against the eyeball, maintaining believable contact and anatomy. The emphasis is on unifying the skin, eyes, and mouth so these high-attention areas read as cohesive, functional, and convincingly human.
Duration: 21m 27s

Scott demonstrates how to rebuild eyebrows so they read as intentional, integrated forms rather than baked-in scan detail. The process covers removing existing eyebrow information from the skin data, replacing it with controlled, hair-based detail, and using cloned elements to better match reference for improved form and direction. It also shows how to repaint normals and albedo so the new eyebrows sit naturally on the face, blend cleanly with the surrounding skin, and respond correctly to lighting, resulting in a more believable, production-ready facial surface.
Duration: 26m 56s

This lesson covers how to reuse 3D Scan Store clothing as a starting point rather than building garments from scratch. Scott focuses on adapting existing scan-based clothing to a new body by scaling and wrapping it to match updated scan proportions. The emphasis is on achieving a strong overall fit and silhouette rather than perfect initial alignment. Once the clothing roughly conforms, it is brought back into ZBrush for sculptural refinement. Forms are adjusted, intersections are cleaned up, and the garment is reshaped to sit naturally on the character while preserving believable weight, folds, and contact with the body.
Duration: 13m 59s

This final lesson focuses on moving the character into Maya and validating it for production. The model is exported from ZBrush and brought into Maya, where Arnold shaders are assigned to begin look development. Materials for skin, cloth, and eyes are tested using the interactive renderer to evaluate how they respond under lighting. Scott uses Mixamo to generate a quick rig, allowing him to test deformation, pose the character, and confirm that the asset functions properly from a technical standpoint. The lesson concludes by ensuring the character is ready for downstream production use and visually holds up in a rendered context.
Duration: 44m 46s

Primary tools
For this workshop you’ll need:
* Note that these programs and materials will not be supplied with the course.
Project Files
When you download the project files, you'll gain access to Scott Denton's resource links, which include everything you need to follow the workshop lessons. Inside, you'll find:
- Resources (.url) – Links to various sources that will help support your learning and workflow
Skills Covered
Who’s this Workshop for?
This workshop is designed for intermediate 3D artists, modelers, and generalists who work with scanned assets and want to integrate them into professional production pipelines. Artists familiar with tools such as Maya, ZBrush, or photogrammetry workflows will find this workshop especially useful for understanding how to efficiently clean, refine, and prepare scan data for downstream use.
Modelers, texture and look-development artists, and pipeline-focused TDs will also benefit from the practical focus on asset organization, export settings, and production-ready workflows. The workshop emphasizes real-world techniques used in studio environments, making it well-suited for artists looking to improve efficiency, meet technical standards, and deliver high-quality scan-based assets for rendering and presentation.
Learning Outcomes
By completing this workshop, artists will gain a practical understanding of how to clean, refine, and prepare scanned assets for professional production pipelines using industry-standard tools.
Key skills include:
- How to clean and process photogrammetry scans efficiently using Wrap 3 and ZBrush.
- How to transfer textures and displacement data between meshes with differing topology.
- How to refine scanned assets for downstream look development and rendering workflows.
- How to export assets with correct settings for modeling, lookdev, and lighting pipelines.
- How to organize and manage scan-based files according to production best practices.
- How to create quick presentation-ready rigs using Mixamo for review and visualization.
- How to prepare scan assets for final rendering in Maya using Arnold materials and shaders.


